
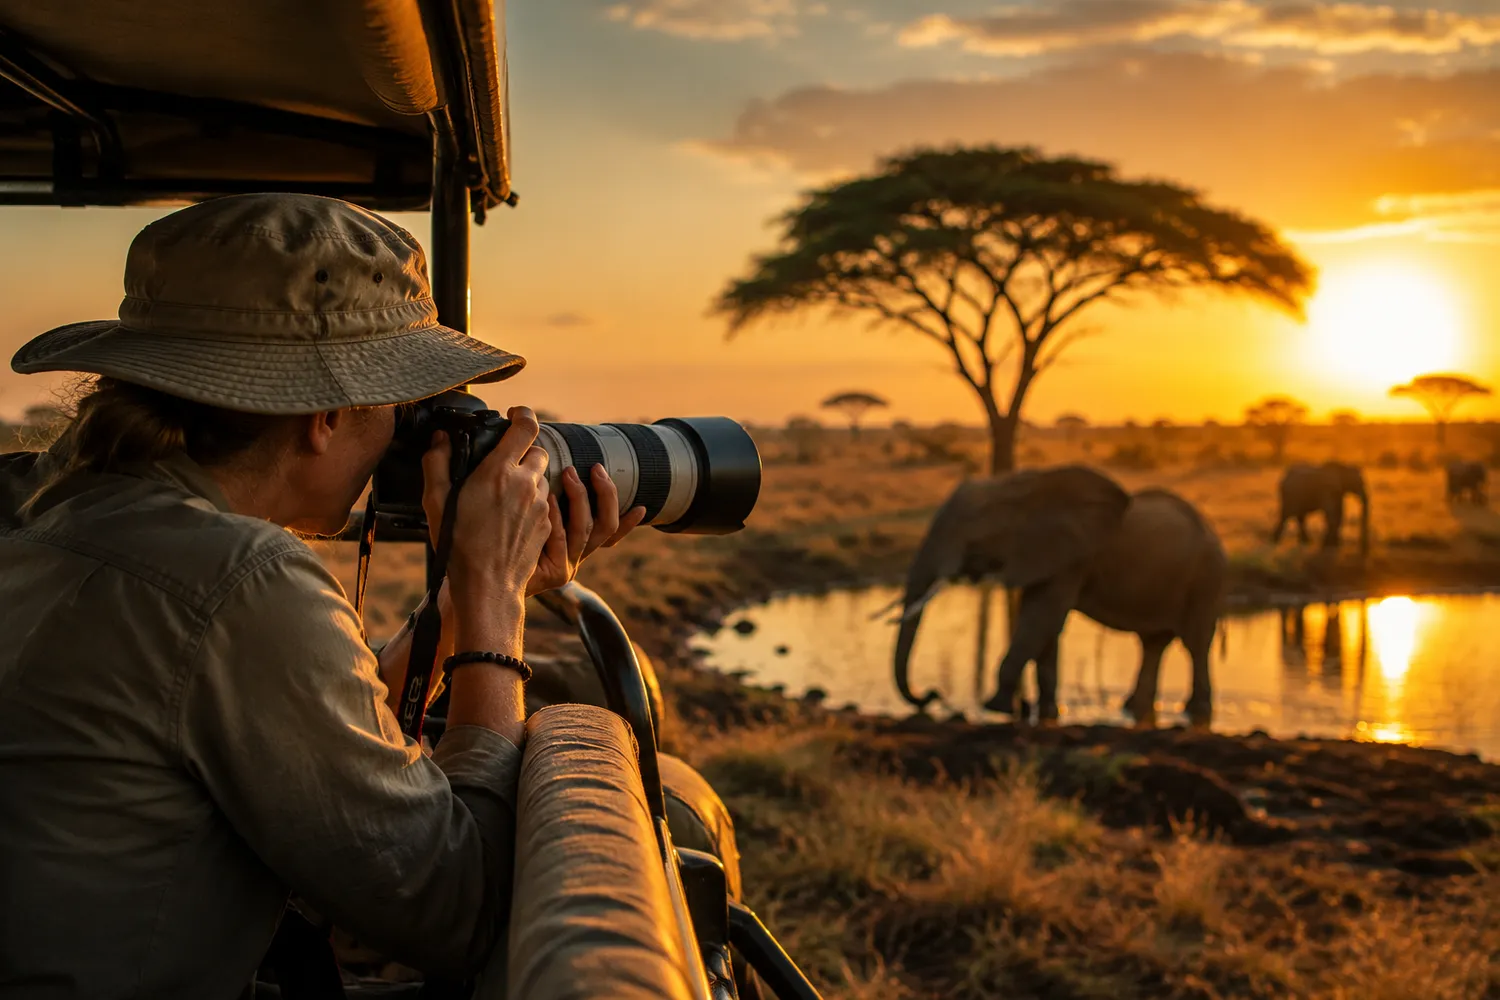
Quick Answer: What Are the Most Important Wildlife Photography Tips for a 6-Day Tanzania Safari?
Use a private vehicle if possible, keep your long lens mounted before action starts, protect sunrise and late-afternoon game-drive time, and choose shutter speed based on movement rather than one fixed setting. A practical field baseline is around 1/500s for moderate movement, 1/1000s or faster for many moving mammals, and 1/1600–1/2500s or faster for fast action when light allows. Use continuous autofocus for moving wildlife, shoot bursts selectively, and watch animal behavior before pressing the shutter.
For route design, spend less time changing hotels and more time observing the same animals. One powerful sequence of a lion pride waking, hunting or interacting is more valuable than ten rushed sightings photographed through bad light.
- Serengeti National Park: 14,763 km² in TANAPA’s 2024 prospectus.
- Ngorongoro Conservation Area: 809,440 ha; UNESCO cites about 25,000 large animals.
- Tarangire: 2,850 km² and TANAPA currently markets 3,000+ elephants in its wildlife section.
- Lake Manyara: 400+ recorded bird species on TANAPA’s current wildlife page.
- Movement baseline: 1/500s can be a practical starting point for fairly fast motion.
- Action baseline: 1/1000s or faster is often safer for wildlife movement.
- Support: bean bag/monopod is usually more practical than a full tripod in a 4x4.
- Rule: no photograph is worth blocking, chasing or disturbing wildlife.
Why a Photography Safari Should Be Planned Differently from a Standard Safari
A photography safari values time at a sighting more than the number of sightings. Standard itineraries often reward movement: find a lion, take a few photographs and continue. Photography frequently improves when you stay long enough to understand what the animal is doing and predict what may happen next.
That difference changes the entire six-day plan. You need fewer rushed transfers, more sunrise departures, space in the vehicle for camera gear and a guide who understands light direction as well as wildlife behavior. Jaynevy’s Tanzania Photography Safari guide explains the broader difference between a normal safari and a photo-focused one.
Best Camera Settings for Tanzania Wildlife Photography
Use these as starting points, not rules. Wildlife speed, focal length, camera stabilization, light and your creative intention all matter. Nikon’s general motion guidance describes around 1/500 second as a useful starting point for fairly fast action and 1/1000 second or above for stronger motion stopping. Its Serengeti Great Migration example used 1/1000s, f/8 and ISO 320 with a 24–70 mm lens for a wide herd scene.
| Subject | Starting shutter speed | Aperture idea | Autofocus / drive |
|---|---|---|---|
| Resting lion / elephant | 1/500s or faster handheld/vehicle-supported | f/4–f/8 depending on depth needed | Single AF or continuous AF; low/medium burst |
| Walking mammal | Around 1/1000s | Often near widest practical aperture | Continuous AF + tracking |
| Running lion/cheetah | 1/1600–1/2500s or faster | Use wider aperture if light is limited | Continuous AF + high-speed burst |
| Bird in flight | Often 1/2000s or faster | f/5.6–f/8 when light permits | Continuous AF + wider tracking zone |
| Landscape / migration herd | Depends on movement; 1/500–1/1000s is often comfortable | f/8–f/11 for more depth | Single or continuous AF depending on scene |
| Intentional motion blur | Try 1/15–1/60s while panning | Adjust ISO/aperture to control exposure | Continuous AF; follow subject smoothly |
Why 1/1000s Is a Useful Baseline—but Not a Law
Nikon’s motion guidance says faster shutter speeds freeze more action and notes 1/500s as a good starting point for fairly fast movement. Nikon wildlife examples commonly move to 1/1000s and above, while faster sequences may need 1/2000s+. Use those figures as field anchors, then watch the image preview and histogram. If a walking lion is sharp at 1/800s, you do not gain anything by forcing ISO unnecessarily high just because a checklist says 1/2000s.
Should You Use Manual Mode, Aperture Priority or Shutter Priority?
Use the mode that lets you protect the variable that matters most. Many experienced wildlife photographers use Manual exposure with Auto ISO because shutter speed and aperture stay where they want while ISO follows changing light. Aperture Priority works well for landscapes and more stable animals; Shutter Priority is useful when freezing movement is the only non-negotiable requirement.
- Manual + Auto ISO: excellent for changing backgrounds while you hold shutter and aperture constant.
- Aperture Priority: useful when depth of field is more important than a precise shutter value.
- Shutter Priority: useful for running animals, birds and panning practice.
- Exposure compensation: essential when a dark animal stands against bright grass or sky.
Best Lens Combination for a 6-Day Tanzania Safari
A long zoom plus a wide-to-normal zoom is the most flexible two-lens setup. The exact focal lengths depend on sensor size and budget, but a 100–400/500 mm or 200–600 mm class lens handles distant mammals and birds, while 24–70 mm or 24–105 mm covers elephants near the vehicle, migration patterns and landscapes.
| Lens range | Best for | Main trade-off |
|---|---|---|
| 24–70 mm / 24–105 mm | Landscapes, close elephants, vehicle context, migration herds, crater rim | Too short for distant predators |
| 70–200 mm | Medium-distance mammals, portraits, larger animals near the road | Limited reach for small birds and distant cats |
| 100–400/500 mm | Best all-round wildlife zoom for many travelers | May require higher ISO at dawn if aperture is slower |
| 150–600 / 200–600 mm | Birds, distant leopard, cheetah, rhino and compressed landscapes | Heavy and sometimes too long when wildlife comes close |
| Fast prime 300/400/500/600 mm | Professional low-light reach and subject isolation | High cost, weight and reduced framing flexibility |
One Camera Body or Two?
One body is enough; two bodies reduce missed moments and dust exposure. On a two-body setup, keep the telephoto on one camera and a 24–70/105 mm lens on the second. If an elephant walks close while your 600 mm lens is mounted, you can switch bodies instead of changing lenses in dust.
If you use one camera, choose a versatile zoom and keep lens changes brief. Carry a rocket blower and microfiber cloth, but avoid opening the camera body while another vehicle is throwing dust across the road.
Why Continuous Autofocus and Animal Eye Detection Matter
Continuous autofocus is the default for moving wildlife because distance changes while the animal moves. Modern cameras with animal/bird recognition can track the eye, head or body, but vegetation can still confuse the system. Sony’s current guidance recommends Continuous AF and subject recognition for animals and birds, with smaller tracking areas useful when grass or branches interfere.
Do not trust automation blindly. If the camera locks onto a branch in front of a leopard, switch to a smaller focus area or a single point and place it on the visible eye or head.
How to Photograph Wildlife Behavior Instead of Static Animals
Watch first, photograph second. Behavior gives you the signal for what comes next. A lion staring at another pride member may stand. A cheetah sitting upright and scanning can begin moving. An elephant calf stepping behind the matriarch may emerge on the other side. Birds often defecate or lean forward immediately before flight.
- Look for changes in posture and attention.
- Keep enough space in the frame for the subject to move into.
- Pre-focus before the action begins.
- Use short bursts rather than filling the card with identical frames.
- Stay with a promising situation longer instead of chasing every radio call.
Best Time of Day for Wildlife Photography
Sunrise and late afternoon usually give the easiest natural light, but midday is not wasted time. Low-angle light creates warm color, long shadows and catchlights. Midday can produce strong contrast, but it is still useful for action, graphic patterns, silhouettes, high-key scenes, birds and wildlife resting in open shade.
| Time | Best photographic use | Main challenge |
|---|---|---|
| Sunrise–09:00 | Warm light, predator movement, mist, backlit dust | Low light can force wider apertures and higher ISO |
| 09:00–15:30 | Behavior, birds, close-ups, graphic compositions, landscapes | Hard shadows and heat shimmer |
| 15:30–sunset | Warm portraits, active predators, silhouettes, rim light | Light drops quickly near sunset |
Best 6-Day Tanzania Wildlife Photography Itinerary
For photographers, fewer hotel changes usually produce better images. This route gives Tarangire one substantial day, Serengeti the deepest time allocation, and Ngorongoro an early final day.
Day 1: Arusha to Tarangire — Elephants, Baobabs and Dust
Leave Arusha early and use Tarangire for environmental elephant images, baobab silhouettes and wide mammal scenes. TANAPA lists the park at 2,850 km² and currently describes 3,000+ elephants in its wildlife section. Instead of using the longest lens all day, photograph scale: a small herd below a giant baobab can say more about Tarangire than a tight elephant headshot.
Day 2: Tarangire to Central Serengeti — Build the Story
Transfer toward Serengeti and keep the camera ready for changing landscapes. TANAPA’s 2024 prospectus lists Serengeti National Park at 14,763 km². Use the afternoon for central Serengeti, but avoid driving long distances only to collect species; learn where resident prides, kopjes and riverine trees sit relative to the light.
Day 3: Full-Day Central Serengeti — Predators and Behavior
Start before sunrise when permitted by lodge and park logistics. Work lion, leopard and cheetah habitat slowly. UNESCO describes Serengeti as supporting one of the world’s largest and most diverse predator-prey systems. For photography, that value comes from behavior: territorial movement, grooming, cub interactions and predator-prey tension.
Day 4: Full-Day Serengeti — Seasonal Sector or Second Central Day
Use the fourth day flexibly. If seasonal migration geography justifies a western, northern or southern extension, move where the ecology supports it. Otherwise, a second full central day can be more productive than an eight-hour relocation. Review Jaynevy’s Serengeti Great Migration photography tips before choosing a migration-focused route.
Day 5: Serengeti Morning Photography to Ngorongoro Highlands
Use morning light in Serengeti, then travel toward Ngorongoro. Arrive early enough to photograph crater-rim landscapes if weather allows. Overnight close enough for an early Day 6 descent.
Day 6: Early Ngorongoro Crater Photography and Return to Arusha
Descend early for wildlife and crater-floor landscape photography. UNESCO lists the wider Ngorongoro Conservation Area at 809,440 hectares and cites about 25,000 large animals. Use longer lenses for distant black rhino or predators, but keep a wider lens available for zebra herds, elephants and the crater wall.
Jaynevy’s Ngorongoro Crater Photoshoot Tour provides additional destination-specific photography context.
Alternative: Add Lake Manyara Only If Its Habitat Matters to Your Portfolio
Lake Manyara adds groundwater forest, elephants, primates, wetlands and 400+ recorded bird species according to TANAPA. That is valuable for bird and forest photography, but if big cats and Serengeti behavior are the main goal, skipping Manyara may produce stronger work by reducing transfer time. See Jaynevy’s Lake Manyara National Park guide.
Best Park for Each Type of Wildlife Photograph
| Destination | Strongest photography themes | Useful lens bias |
|---|---|---|
| Tarangire | Elephants, baobabs, dust, river ecology, environmental portraits | Wide-to-medium + telephoto |
| Serengeti | Big cats, migration, open plains, behavior, action | Telephoto + second wide body |
| Ngorongoro | Dense multi-species scenes, distant rhino, crater landscapes | Long telephoto + wide zoom |
| Lake Manyara | Forest, primates, birds, elephants, Rift Valley landscapes | 100–400/500 mm + wide zoom |
Dry Season vs Green Season for Photography
Choose the season by image style rather than the phrase “best time.” June to October often gives drier roads, shorter grass and dusty backlight. November to May can provide green backgrounds, cloud drama, migrant birds and calving-season opportunities in the southern Serengeti ecosystem.
| Season | Photo strengths | Main challenge |
|---|---|---|
| Jun–Oct dry season | Wildlife concentration, shorter vegetation, dust, warm tones, easier roads | More vehicles in peak areas; harsh midday light |
| Nov–Feb green/short-rain season | Green backgrounds, dramatic skies, migrants, southern Serengeti calving context | Rain changes roads and light quickly |
| Mar–May long rains | Lushest landscapes, reflections, fewer visitors, moody weather | Mud, taller grass and possible access changes |
How to Photograph the Great Migration Without Chasing the Herds
Migration photography improves when you photograph patterns, behavior and scale—not only crossings. UNESCO’s current Serengeti profile cites roughly 2 million wildebeest, 900,000 Thomson’s gazelles and 300,000 zebras as dominant herds in the ecosystem. These are conservation reference figures, not a promise that the animals will be concentrated around your lodge.
A Nikon Serengeti example used a 24–70 mm lens at 70 mm, 1/1000s, f/8 and ISO 320 to photograph a wide migration scene. That is a useful reminder that huge herds often need a wide lens, not the longest telephoto you own.
How to Position the Safari Vehicle for Better Photographs
Ask for light direction and a clean background, not illegal proximity. A good guide can often move forward or backward on a permitted road to improve the angle. The ideal position avoids cutting an animal’s movement path and gives the subject visual space.
- Keep the sun behind or to the side for easy detail; shoot into it intentionally for rim light and dust.
- Move the vehicle only when it will not disrupt wildlife or another guest’s sighting.
- Ask for a lower window angle when safe and legal; eye-level images usually feel more intimate.
- Leave space in front of a walking or running animal.
- Watch the background before focusing on the subject.
For vehicle-specific planning, see Jaynevy’s Tanzania Open Vehicle Game Drive.
Bean Bag, Monopod or Tripod?
Inside a safari vehicle, a bean bag is usually the simplest support. It rests on a window frame or roof edge and absorbs vibration without occupying floor space. A monopod can help with heavy telephotos, while a full tripod is mainly useful outside the vehicle at lodges, camps or designated viewpoints.
- Bean bag: best all-round vehicle support.
- Monopod: useful for heavy lenses and open-sided vehicles.
- Tripod: useful for landscapes, stars or static camp photography where permitted.
- Image stabilization: keep it on unless your lens/manual recommends a specific support mode.
How to Protect Camera Gear from Dust, Rain and Heat
- Keep a blower, microfiber cloth and lens brush in the vehicle.
- Avoid changing lenses while another vehicle is passing through dust.
- Use a simple rain cover or dry bag during green-season showers.
- Do not leave camera bodies baking in direct sun on the seat.
- Keep batteries and cards in labeled, dust-resistant pouches.
- Back up photographs every evening to a laptop or portable drive when possible.
Private vs Shared Safari for Wildlife Photographers
Private is usually the better photographic investment because time and position are the scarce resources. A shared vehicle can still produce excellent photographs, but every guest has a different subject preference and tolerance for waiting.
| Factor | Private 4x4 | Shared safari |
|---|---|---|
| Time at one sighting | Your group decides | Must satisfy the whole group |
| Vehicle positioning | More flexibility within park rules | Shared viewing priorities |
| Gear space | More control | Limited when vehicle is full |
| Sunrise departure | Easier to prioritize | Depends on group agreement |
| Cost | Higher for small groups | Lower per person |
Ethical Wildlife Photography Rules That Improve Your Images
- Do not pressure the driver to go off-road where prohibited.
- Never block an animal’s path to water, prey, cubs or shade.
- Avoid repeated flash around wildlife.
- Keep voices low near predators and nesting birds.
- Do not use food or artificial attraction.
- Do not crowd a sighting just because another vehicle found it.
- Respect sensitive wildlife locations.
Common Wildlife Photography Mistakes on a 6-Day Safari
- Using a shutter speed that is too slow for action.
- Keeping the longest lens mounted for every scene.
- Ignoring backgrounds and cutting off feet/tails.
- Shooting thousands of identical burst frames.
- Changing lenses in heavy dust.
- Leaving no empty space for a moving animal to enter.
- Chasing species instead of waiting for behavior.
- Booking too many parks for six days.
Useful Jaynevy Tours Internal Links for Photography Planning
- Tanzania Photography Safari Tours 2026/2027
- 6-Day Landscape Photography Tour
- Photography Tips for the Serengeti Great Migration
- Ngorongoro Crater Photoshoot Tour
- Tanzania Open Vehicle Game Drive
- Serengeti National Park
- Tarangire National Park
- 6-Day Luxury Great Migration Safari Tanzania
Frequently Asked Questions About 6-Day Tanzania Safari Wildlife Photography
Is six days enough for a wildlife photography safari in Tanzania?
Yes, if you keep the route focused. A strong six-day photography safari can combine Tarangire, three substantial Serengeti game-drive periods and an early Ngorongoro Crater day. Photography benefits from time and patience, so adding too many parks usually reduces image quality.
What is the best lens for a Tanzania safari?
A flexible telephoto zoom in roughly the 100–400 mm, 100–500 mm, 150–500 mm or 200–600 mm class is highly practical from a safari vehicle. Also carry a wider lens such as 24–70 mm for elephants at close range, migration herds, baobabs, crater landscapes and environmental portraits.
What shutter speed should I use for safari wildlife?
There is no universal shutter speed. As a field starting point, around 1/500 second can work for moderate movement, while 1/1000 second or faster is safer for many moving mammals. Fast action such as running predators or birds may need 1/1600 to 1/2500 second or faster, depending on light, focal length and the effect you want.
Should I shoot RAW or JPEG on safari?
RAW gives more latitude for recovering highlights, shadows and white balance, especially in harsh midday contrast or sunrise light. JPEG creates smaller files and faster workflows. Many photographers use RAW or RAW+JPEG if storage capacity is sufficient.
Is a private safari vehicle better for photographers?
Usually yes. A private vehicle lets your group wait longer, reposition when park rules allow, choose which side of the vehicle gets the light and skip sightings that do not match your photographic goal. It also reduces conflict over window and roof space.
Do I need two camera bodies?
No, but two bodies are useful. One can carry a telephoto lens and the other a wider zoom, reducing lens changes in dust and making it easier to react when an elephant approaches close while your long lens is mounted.
What is the best time of day for wildlife photography in Tanzania?
Early morning and late afternoon usually provide softer, lower-angle light and often coincide with increased animal activity. Midday is still useful for behavior, birds, backlit dust, high-key images, details and scenes where action matters more than warm light.
Is the dry season or green season better for photography?
Both are strong. June to October usually offers drier roads, shorter vegetation and concentrated wildlife around water. November to May brings greener backgrounds, dramatic skies, migrant birds and calving-season opportunities in the southern Serengeti ecosystem. Choose based on the images you want.
Can I use a tripod in a safari vehicle?
A full tripod is usually awkward inside a 4x4. A bean bag, monopod or lens resting technique is often more practical. The exact support depends on the vehicle design and whether you shoot through a roof opening or side window.
How much memory should I bring for six days?
Bring more than you expect to use. Continuous shooting, RAW files and video consume storage quickly. Instead of relying on one large card, carry multiple high-quality cards and back up daily to a second device when possible.
Research Notes and Trusted Sources
This page separates wildlife data from camera-setting recommendations. Park sizes and animal reference figures come from TANAPA and UNESCO. Camera settings are presented as starting points supported by manufacturer education material, not fixed formulas that guarantee sharp photographs.
- TANAPA Investment Prospectus 2024 — Serengeti National Park area of 14,763 km².
- TANAPA Tarangire National Park — 2,850 km² and current elephant reference information.
- TANAPA Lake Manyara Wildlife & Habitats — 400+ recorded bird species.
- UNESCO Ngorongoro Conservation Area — 809,440 ha and roughly 25,000 large animals.
- UNESCO Serengeti National Park — migration and large herbivore reference figures.
- Nikon: Photographing the Great Migration — Serengeti field example at 1/1000s, f/8, ISO 320 and 70 mm.
- Nikon: Capturing or Freezing Motion — shutter-speed fundamentals and 1/500s starting guidance for fairly fast movement.
- Sony Animal/Bird Focus Guide — Continuous AF, animal/bird recognition and tracking guidance.
- Google Search Central: Generative AI Search Optimization — unique, non-commodity, people-first content; foundational SEO remains relevant for AI Overviews and AI Mode.
- Google Search Documentation Updates — June 2026 removal of FAQ rich-result documentation and July 2026 documentation changes.
SEO/AEO implementation note: Google’s current guidance says there is no special AEO/GEO markup required for AI search. This page therefore prioritizes first-useful answers, original decision guidance, responsive tables, accurate metadata, strong internal linking, relevant image metadata and visible expert context. FAQs remain for readers, but the page does not depend on FAQ rich-result markup because Google removed that feature in 2026.